
DIY Mini Scalloped Bunting

I have found out two weeks ago that we are expecting a baby boy in October,
already I have begun the house move around and begun slowly preparing the
nursery and "big girl" room - mostly in my mind!
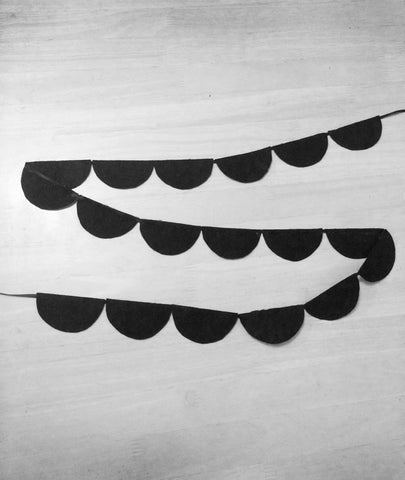
To kick off my nursery I am starting small, with a little crafty activity to create
the petite black scalloped bunting you can see in my inspiration photo board.
This bunting is just supposed to reinforce the hint of black in the nursery so
it is only small, something you could hang from a small shelf, across a photo
frame or artwork etc.
APPROX TIME - 20 to 30 mins
To start you will need :
1 x A4 Sheet of craft felt
1 - 2 Metres of 5mm ribbon or string
Scissors
Hot glue gun
Wax crayon in a contrasting colour
A cup or tumbler to trace around

1. Place your cup or tumbler on the corner of your felt sheet and trace around with the wax crayon. Repeat this until you have no more room on your felt sheet.

2. Cut out all your circles! It seems easier to first cut a square around your circle, fold it in half (with wax tracing outward) and cut a semi-circle out instead.

3. Cut all your circles in half! Easiest way is just to fold them in half and cut the fold - easy! Now you are ready to begin glueing. Roll out your ribbon, run your hot glue gun along the straight edge of your felt semi circle and place your ribbon along it - press down being careful not to burn your fingers on the glue!

4. Repeat the glueing for all you semi circles, having the edges as close together as you can. By the time you are done you should have approx a metre of this sweet mini scalloped bunting!
Now you are a pro, why not try alternating colours and different shapes ?
Leave a comment
Please note, comments must be approved before they are published